How to verify your app is installed from Play Store

Android provides a way to determine whether our app is installed via playstore or by any other appliaction. It would be very handy in case if we need to perform any action only when its a valid play store build and to ignore when its a debug build or a direct apk install from any apk sharing applications

 Android's PackageManager class helps us to identify the application that installed our app. Lets see how its done.

How To Read A File From Asset Folder In Android

Sometimes we might need to save few contents in a file and would try to access them in our android app. Say for example, you are working on an app and would like to mock your web service response, you can create a mock response (.json file) and place them in your Assets folder and access them.

The below code snippet can be used to read a file's content located at the asset folder in an android project. There is nothing fancy about it, it uses Java InputStream to read the file content and Android's Context to access file from Assets folder

Android Runtime Premission Example

     Every android app runs on its own sandbox. If in needs to access any recourse outside its sandbox, it should request permission from the system. There are few permissions that are automatically granted and there are few permissions that would require user to grant permission. Eg: location,contacts, sms etc.,

     All permissions that your app requires should be declared in the manifest file. Devices running Android 5.1(API level 22) and below, would request permission when the user installs the app and devices running Android 6 (API level 23) and above will request permissions when that app tries to use the resource which needs the permission i.e runtime permissions

So lets try a runtime permission sample program.

Step1: Create an android project with an Activity (PermissionActivity.java) and a layout file (activity_permission.xml)

Stept2: Now declare the required permission in the manifest file. This sample program would need SEND_SMS permission and your manifest file should look similar to the one below


Step3: Now lets design the screen with a TextView and a Button. The textview is used to display the current status of the permission and the button is used to request permission if not granted and if granted proceed with the functionality with the acquired permission

activity_permission.xml:

Step4: Now in the Activity, bind the UI components (TextView & Button). On click of the button request for SMS permission and proceed with the permission acquired.

PermissionActivity.java:
      On click of the button, we would check if the API version is 23 & above then we should check if the app has the permission or not using checkSelfPermission method. If not request the user for the permission at runtime using ActivityCompat.requestPermissions.

      During the permission request user may select Never ask again option and deny the permission. In such case, use the shouldShowRequestPremissionRationale which would be false, to determine whether to show an alternative explanation to user and direct him to setting menu or not.

      For all actions performed by the user in the runtime permission request dialog, we would receive a callback in the onRequestPermissionResult method.

Step5: Run the app in an emulator or device with Android API level 23 or above. Click on the Send SMS button. System would prompt a dialog requesting a runtime permission to send sms from you app.


Output:

How to check Network Connectivity Status in Android

In this post, we will see how to check the Network Connectivity Status in Android. Our app may have to behave differently based on the network it is connected i.e wifi,mobile,vpn etc., To check the network connectivity info, we use the ConnectivityManager and NetworkInfo class of android net package.

The below snippet demonstrates how to detect whether the mobile is connected to WIFI or Mobile data.

Code Snippet:

Android Shared Content Transition Example.


In this blog we will see how androids shared content transition works. Generally you would have seen this kind of transition in image gallery where an image in a cell of a grid would transition into a full screen image

So lets start

1.     Create a new project File->New->Project. While creating the project, create two activities and name them a FirstActivity.java and SecondActivity.java. Create layout files for the activities as activity_first.xml and activity_second.xml
2.     Now let us design the UI for both the layout files.

activity_first.xml:

<?xml version="1.0" encoding="utf-8"?>
<LinearLayout
   
xmlns:android="http://schemas.android.com/apk/res/android"
   
xmlns:tools="http://schemas.android.com/tools"
   
android:layout_width="match_parent"
   
android:layout_height="match_parent"
   
android:orientation="vertical"
   
android:paddingLeft="@dimen/activity_horizontal_margin"
   
android:paddingRight="@dimen/activity_horizontal_margin"
   
android:paddingTop="@dimen/activity_vertical_margin"
   
android:paddingBottom="@dimen/activity_vertical_margin"
   
tools:context="apps.colloquial.sharedelementtransition.FirstActivity">

    <
TextView
       
android:text="App List"
       
android:layout_width="match_parent"
        
android:layout_height="wrap_content"
       
android:textSize="25dp"
       
android:gravity="center"/>

    <
ImageView
       
android:id="@+id/iv1"
       
android:layout_marginTop="10dp"
       
android:layout_width="match_parent"
       
android:layout_height="100dp"
       
android:transitionName="appImage"
       
android:onClick="openDetails"
       
android:src="@drawable/ck_cover"/>

    <
ImageView
       
android:id="@+id/iv2"
       
android:layout_width="match_parent"
       
android:layout_height="100dp"
       
android:layout_marginTop="10dp"
       
android:transitionName="appImage"
       
android:onClick="openDetails"
       
android:src="@drawable/scribble_cover"/>
</
LinearLayout>

activity_second.xml:

<?xml version="1.0" encoding="utf-8"?>
<LinearLayout
    xmlns:android="http://schemas.android.com/apk/res/android"
    xmlns:tools="http://schemas.android.com/tools"
    android:layout_width="match_parent"
    android:layout_height="match_parent"
    android:orientation="vertical"
    android:paddingLeft="@dimen/activity_horizontal_margin"
    android:paddingRight="@dimen/activity_horizontal_margin"
    android:paddingTop="@dimen/activity_vertical_margin"
    android:paddingBottom="@dimen/activity_vertical_margin"
    tools:context="apps.colloquial.sharedelementtransition.FirstActivity">

    <TextView
        android:text="App Detail"
        android:layout_width="match_parent"
        android:layout_height="wrap_content"
        android:textSize="25dp"
        android:gravity="center"/>
    <ImageView
        android:id="@+id/iv"
        android:layout_marginTop="10dp"
        android:layout_width="match_parent"
        android:layout_height="200dp"
        android:transitionName="appImage"
        android:src="@drawable/ck_cover"/>
    <TextView
        android:layout_marginTop="10dp"
        android:text="App Detail: \n\n Blah Blah blah \n Blah blah \n Blah"
        android:layout_width="match_parent"
        android:layout_height="wrap_content"
        android:textSize="25dp"
        />
</LinearLayout>

3.     Note the transitionName attribute in ImageView. The value of this attribute should be same in both the layout file. Now use Intents to navigate from one activity to another. While starting the activity send the ActivityOption parameter, similar to the one below in FirstActivity

FirstActivity.java:

public class FirstActivity extends AppCompatActivity {

    @Override
    protected void onCreate(Bundle savedInstanceState) {
        super.onCreate(savedInstanceState);
        setContentView(R.layout.activity_first);
    }

    public void openDetails(View view){
        Intent intent = new Intent(FirstActivity.this, SecondActivity.class);
        if(view.getId()==R.id.iv1){
            intent.putExtra("Item", 1);
        }else{
            intent.putExtra("Item", 2);
        }
        ActivityOptionsCompat options = ActivityOptionsCompat.
                makeSceneTransitionAnimation(FirstActivity.this, view, "appImage");
        startActivity(intent, options.toBundle());
    }
}


4.     Now in the SecondActivity, receive the intent extras and decide which image to be displayed in the transition animation.

Second Activity:

-->
public class SecondActivity extends AppCompatActivity {

    ImageView
imageView;
   
@Override
   
protected void onCreate(Bundle savedInstanceState) {
       
super.onCreate(savedInstanceState);
        setContentView(R.layout.
activity_second);

       
imageView = (ImageView) findViewById(R.id.iv);

       
int i = getIntent().getIntExtra("Item",1);
       
if (i==1)
           
imageView.setImageResource(R.drawable.ck_cover);
       
else
           
imageView.setImageResource(R.drawable.scribble_cover);

    }
}
5. Run the project in an android device or an emulator. The output should look similar to the video below

How to use external Fonts in Android


Android provides very few font styles.So in this post I will show how to use external fonts for the TextViews in our android application.

Step1:

Create a folder named 'fonts' in the assets folder of the android application.

Step2:

Download any font in '.ttf' or '.otf'  format and copy it in the fonts folder

Step3:

Create a layout file and add a TextView in the layout and give it an id to be refered.

Step4:

In the onCreate method of the Activity file bind the TextView and set the Typeface as shown below

TextView tvWord = (TextView) findViewById(R.id.tvWord);
Typeface tf = Typeface.createFromAsset(getAssets(), "fonts/sample.ttf");
tvWord.setTypeface(tf);

Thats it!!! Run the app in an emulator or a device to see the result.

Android Spinner Example

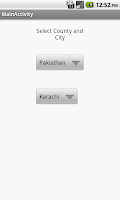
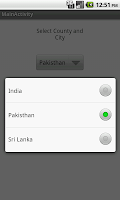
In this example we will see how to work with spinners in android. Spinners are used for selecting one value from a given set like the drop down list. We will create dependent spinner i.e the entries of the second spinner depends on the value selected in the first spinner.

In this sample application we will have two spinner first one for selecting country and the other for selecting city. Depending on the country selected in the first spinner the cities in the second spinner changes.

Lets start:

1.Create an Android Application Project (File->New->Android Application Project). While creating the project name the Activity as MainActivity(MainActivity.java) and the layout file as activity_main (activity_main.xml).

2.When done with creating the project add array resources to your strings.xml file in res/values folder which will serve as the data source for the spinners.

strings.xml:

<resources>

<string name="app_name">Spinner</string>
<string name="hello_world">Hello world!</string>
<string name="title_activity_main">MainActivity</string>

<string-array name="country_array">
<item>India</item>
<item>Pakisthan</item>
<item>Sri Lanka</item>
</string-array>
<string-array name="city_india">
<item>Mumbai</item>
<item>Chennai</item>
<item>Kolkata</item>
<item>Bangalore</item>
</string-array>
<string-array name="city_pakisthan">
<item>Karachi</item>
<item>Lahore</item>
<item>Faisalabad</item>
<item>Rawalpindi</item>
</string-array>
<string-array name="city_srilanka">
<item>Colombo</item>
<item>Dehiwala-Mount Lavinia</item>
<item>Moratuwa</item>
<item>Kotte</item>
</string-array>
</resources>


3.Design the UI with a TextView & two Spinners and assign default entries for the spinners.

activity_main.xml:

<?xml version="1.0" encoding="utf-8"?>
<RelativeLayout xmlns:android="http://schemas.android.com/apk/res/android"
android:layout_width="match_parent"
android:layout_height="match_parent"
android:gravity="left" >

<TextView
android:id="@+id/textView"
android:layout_width="130dp"
android:layout_height="50dp"
android:layout_alignParentTop="true"
android:layout_centerHorizontal="true"
android:layout_marginTop="15dp"
android:gravity="center"
android:text="Select County and City"
android:textSize="15dp"
/>

<Spinner
android:id="@+id/spinnerCountry"
android:layout_width="wrap_content"
android:layout_height="wrap_content"
android:layout_below="@+id/textView"
android:layout_centerHorizontal="true"
android:layout_marginTop="28dp"
android:entries="@array/country_array" />

<Spinner
android:id="@+id/spinnerCity"
android:layout_width="wrap_content"
android:layout_height="wrap_content"
android:layout_alignLeft="@+id/spinnerCountry"
android:layout_below="@+id/spinnerCountry"
android:layout_marginTop="42dp"
android:entries="@array/city_india" />

</RelativeLayout>

4.Now in the Activity file we will create the spinners instances and change the adapters data-source for the second spinner(city) depending on the value selected in the first spinner(country). This is done in the onItemSelected callback method of the first spinner.

MainActivity.java:
import android.app.Activity;
import android.os.Bundle;
import android.view.View;
import android.widget.AdapterView;
import android.widget.AdapterView.OnItemSelectedListener;
import android.widget.ArrayAdapter;
import android.widget.Spinner;

public class MainActivity extends Activity implements OnItemSelectedListener {

 Spinner spinnerCountry, spinnerCity;

 @Override
 protected void onCreate(Bundle savedInstanceState) {
  super.onCreate(savedInstanceState);
  setContentView(R.layout.activity_main);
  spinnerCountry = (Spinner) findViewById(R.id.spinnerCountry);
  spinnerCity = (Spinner) findViewById(R.id.spinnerCity);
  spinnerCountry.setOnItemSelectedListener(this);
 }

 @Override
 public void onItemSelected(AdapterView<?> parent, View arg1, int pos,
   long arg3) {
  parent.getItemAtPosition(pos);
  if (pos == 0) {
   ArrayAdapter<CharSequence> adapter = ArrayAdapter
     .createFromResource(this, R.array.city_india,
       android.R.layout.simple_spinner_item);
   spinnerCity.setAdapter(adapter);
  } else if (pos == 1) {
   ArrayAdapter<CharSequence> adapter = ArrayAdapter
     .createFromResource(this, R.array.city_pakisthan,
       android.R.layout.simple_spinner_item);
   spinnerCity.setAdapter(adapter);
  } else if (pos == 2) {
   ArrayAdapter<CharSequence> adapter = ArrayAdapter
     .createFromResource(this, R.array.city_srilanka,
       android.R.layout.simple_spinner_item);
   spinnerCity.setAdapter(adapter);
  }
 }

 @Override
 public void onNothingSelected(AdapterView<?> arg0) {
 }
}


5.Run the application by right clicking the project Run As->Android Application. You would see and output similar to the one below

Output:


Android Display Running Application Process Programmatically – Example

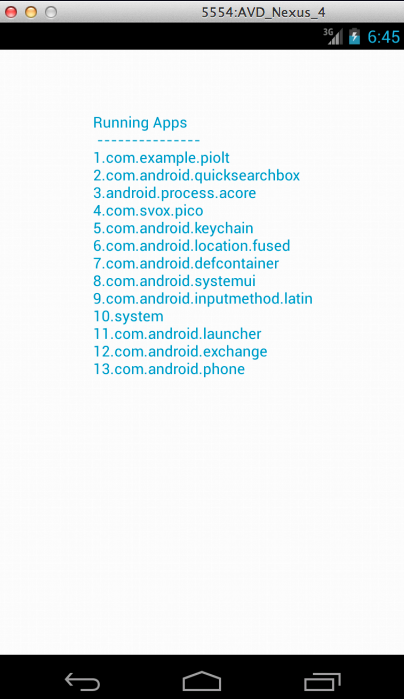
In this post we will see how to display all the running application process in a device or emulator.  It can be done by creating an instance for the ActivityManager Class . In this sample application we will get the list of running app process in a List and will display it in a TextView .


So lets start:


1.Create a new project File ->New -> Project ->Android ->Android Application Project. While creating the new project, name the activity as MainActivity(MainActivity.java)and layout as activity_main.xml.

2.Now let us design the UI for the MainActivity i.e activity_main.xml with a TextView.

activity_main.xml:


<RelativeLayout xmlns:android="http://schemas.android.com/apk/res/android"
    xmlns:tools="http://schemas.android.com/tools"
    android:layout_width="match_parent"
    android:layout_height="match_parent"
    tools:context=".MainActivity" >

    <TextView
        android:id="@+id/textView"
        android:layout_width="wrap_content"
        android:layout_height="wrap_content"
        android:text="Running Apps \n" />

</RelativeLayout>


3.Now in the MainActivity use ActvityManager instance and get the appropriate system service and list them in a textview.

MainActivity.java:

package com.example.piolt;

import java.util.List;

import android.app.Activity;
import android.app.ActivityManager;
import android.app.ActivityManager.RunningAppProcessInfo;
import android.os.Bundle;
import android.widget.TextView;

public class MainActivity extends Activity {

 @Override
 protected void onCreate(Bundle savedInstanceState) {
  super.onCreate(savedInstanceState);
  setContentView(R.layout.activity_main);

  TextView tv = (TextView) findViewById(R.id.textView);

  ActivityManager activityManager = (ActivityManager) this
    .getSystemService(ACTIVITY_SERVICE);

  List<RunningAppProcessInfo> procInfos = activityManager
    .getRunningAppProcesses();
  for (int idx = 0; idx < procInfos.size(); idx++) {

   tv.setText(tv.getText() + "" + (idx + 1) + "."
     + procInfos.get(idx).processName + "\n");

  }

 }

}

4.Run the project by rightclicking project Run as → android project in an android device.


Output:


The output of this example would be similar to the one as follows:


Android Accelerometer Example


In this sample application we will put the android accelerometer sensor into use . Nowadays accelerometer is used more in motion games where the user tilts the phone for a specific action to take place or used for shake detection. It has become common to shake the device to reset the application or erase a canvas in paint apps.

In this example we will change the image in the ImageView with respect to the users actions (like tilting the phone up,down right and left).Like we used for the proximity sensor example we use the SensorManager class and get the accelerometer sensor service. On the overridden method onSensorChanged we monitor the sensor values of all 3 axises (x ,y & z). Keep a threshold valued of 2.0 for center and change the image according the the axis values. Hope you got the idea.


Now lets start:

1.Create a new project File ->New -> Project ->Android ->Android Application Project. While creating the new project, name the activity as AccelerometerActivity(AccelerometerActivity.java) and layout as activity_accelerometer.xml.

2.Now let us design the UI for the AccelerometerActivity i.e activity_accelerometer.xml with an ImageView and a TextView.Have images in drawable folder to differentiate each tilting motion(Here I have images for center,top,right,bottom and left).

activity_accelerometer.xml


<RelativeLayout xmlns:android="http://schemas.android.com/apk/res/android"
xmlns:tools="http://schemas.android.com/tools"
android:id="@+id/relative"
android:layout_width="fill_parent"
android:layout_height="fill_parent" >
<TextView
android:id="@+id/txt"
android:layout_width="fill_parent"
android:layout_height="wrap_content"
android:textSize="20dp"
android:text="Tilt the phone to see the difference" />

<ImageView
android:id="@+id/imageView1"
android:layout_width="fill_parent"
android:layout_height="fill_parent"
android:layout_below="@+id/txt"
android:layout_centerHorizontal="true"
android:scaleType="fitXY"
android:src="@drawable/center" />
</RelativeLayout>

3.Now in the AccelerometerActivity use a logic to identify the tilting action and replace the images accordingly. Do not forget to unregister the sensor to save battery.

AccelerometerActivity.java 

import android.app.Activity;
import android.content.Context;
import android.hardware.Sensor;
import android.hardware.SensorEvent;
import android.hardware.SensorEventListener;
import android.hardware.SensorManager;
import android.os.Bundle;
import android.widget.ImageView;
import android.widget.TextView;

public class AccelerometerActivity extends Activity implements
  SensorEventListener {

 private SensorManager mSensorManager;
 private Sensor mAccelerometer;
 TextView title;
 ImageView iv;

 @Override
 public void onCreate(Bundle savedInstanceState) {
  super.onCreate(savedInstanceState);
  setContentView(R.layout.activity_accelerometer);
  mSensorManager = (SensorManager) getSystemService(Context.SENSOR_SERVICE);
  mAccelerometer = mSensorManager
    .getDefaultSensor(Sensor.TYPE_ACCELEROMETER);
  title = (TextView) findViewById(R.id.txt);
  iv = (ImageView) findViewById(R.id.imageView1);
 }

 @Override
 public void onAccuracyChanged(Sensor arg0, int arg1) {
  // TODO Auto-generated method stub
 }

 @Override
 public void onSensorChanged(SensorEvent event) {
  float x = event.values[0];
  float y = event.values[1];
  float z = event.values[2];
  if (Math.abs(x) > Math.abs(y)) {
   if (x < 0) {
    iv.setImageResource(R.drawable.right);
   }
   if (x > 0) {
    iv.setImageResource(R.drawable.left);
   }
  } else {
   if (y < 0) {
    iv.setImageResource(R.drawable.top);
   }
   if (y > 0) {
    iv.setImageResource(R.drawable.bottom);
   }
  }
  if (x > (-2) && x < (2) && y > (-2) && y < (2)) {
   iv.setImageResource(R.drawable.center);
  }
 }

 @Override
 protected void onResume() {
  super.onResume();
  mSensorManager.registerListener(this, mAccelerometer,
    SensorManager.SENSOR_DELAY_NORMAL);
 }

 @Override
 protected void onPause() {
  super.onPause();
  mSensorManager.unregisterListener(this);
 }
}


4.Run the project by rightclicking project Run as → android project in an android device.

Output:

The output of this example would be similar to the one as follows: