Showing posts with label android. Show all posts

How To Read A File From Asset Folder In Android

Sometimes we might need to save few contents in a file and would try to access them in our android app. Say for example, you are working on an app and would like to mock your web service response, you can create a mock response (.json file) and place them in your Assets folder and access them.

The below code snippet can be used to read a file's content located at the asset folder in an android project. There is nothing fancy about it, it uses Java InputStream to read the file content and Android's Context to access file from Assets folder

How to use external Fonts in Android


Android provides very few font styles.So in this post I will show how to use external fonts for the TextViews in our android application.

Step1:

Create a folder named 'fonts' in the assets folder of the android application.

Step2:

Download any font in '.ttf' or '.otf'  format and copy it in the fonts folder

Step3:

Create a layout file and add a TextView in the layout and give it an id to be refered.

Step4:

In the onCreate method of the Activity file bind the TextView and set the Typeface as shown below

TextView tvWord = (TextView) findViewById(R.id.tvWord);
Typeface tf = Typeface.createFromAsset(getAssets(), "fonts/sample.ttf");
tvWord.setTypeface(tf);

Thats it!!! Run the app in an emulator or a device to see the result.

Android Display Running Application Process Programmatically – Example

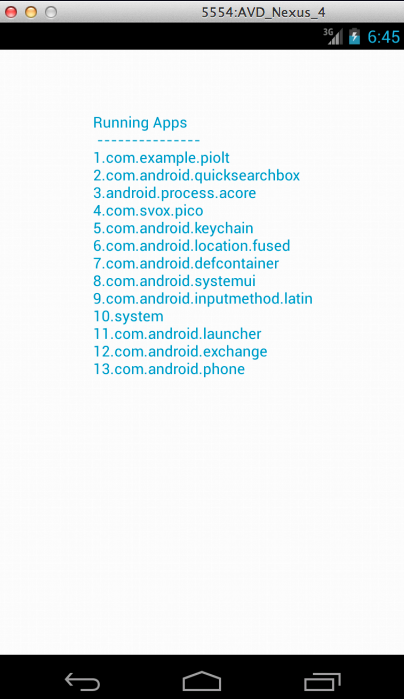
In this post we will see how to display all the running application process in a device or emulator.  It can be done by creating an instance for the ActivityManager Class . In this sample application we will get the list of running app process in a List and will display it in a TextView .


So lets start:


1.Create a new project File ->New -> Project ->Android ->Android Application Project. While creating the new project, name the activity as MainActivity(MainActivity.java)and layout as activity_main.xml.

2.Now let us design the UI for the MainActivity i.e activity_main.xml with a TextView.

activity_main.xml:


<RelativeLayout xmlns:android="http://schemas.android.com/apk/res/android"
    xmlns:tools="http://schemas.android.com/tools"
    android:layout_width="match_parent"
    android:layout_height="match_parent"
    tools:context=".MainActivity" >

    <TextView
        android:id="@+id/textView"
        android:layout_width="wrap_content"
        android:layout_height="wrap_content"
        android:text="Running Apps \n" />

</RelativeLayout>


3.Now in the MainActivity use ActvityManager instance and get the appropriate system service and list them in a textview.

MainActivity.java:

package com.example.piolt;

import java.util.List;

import android.app.Activity;
import android.app.ActivityManager;
import android.app.ActivityManager.RunningAppProcessInfo;
import android.os.Bundle;
import android.widget.TextView;

public class MainActivity extends Activity {

 @Override
 protected void onCreate(Bundle savedInstanceState) {
  super.onCreate(savedInstanceState);
  setContentView(R.layout.activity_main);

  TextView tv = (TextView) findViewById(R.id.textView);

  ActivityManager activityManager = (ActivityManager) this
    .getSystemService(ACTIVITY_SERVICE);

  List<RunningAppProcessInfo> procInfos = activityManager
    .getRunningAppProcesses();
  for (int idx = 0; idx < procInfos.size(); idx++) {

   tv.setText(tv.getText() + "" + (idx + 1) + "."
     + procInfos.get(idx).processName + "\n");

  }

 }

}

4.Run the project by rightclicking project Run as android project in an android device.


Output:


The output of this example would be similar to the one as follows:

Android Accelerometer Example


In this sample application we will put the android accelerometer sensor into use . Nowadays accelerometer is used more in motion games where the user tilts the phone for a specific action to take place or used for shake detection. It has become common to shake the device to reset the application or erase a canvas in paint apps.

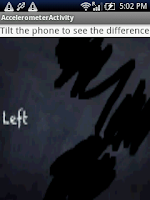
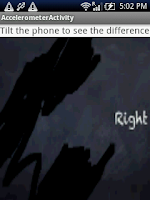
In this example we will change the image in the ImageView with respect to the users actions (like tilting the phone up,down right and left).Like we used for the proximity sensor example we use the SensorManager class and get the accelerometer sensor service. On the overridden method onSensorChanged we monitor the sensor values of all 3 axises (x ,y & z). Keep a threshold valued of 2.0 for center and change the image according the the axis values. Hope you got the idea.


Now lets start:

1.Create a new project File ->New -> Project ->Android ->Android Application Project. While creating the new project, name the activity as AccelerometerActivity(AccelerometerActivity.java) and layout as activity_accelerometer.xml.

2.Now let us design the UI for the AccelerometerActivity i.e activity_accelerometer.xml with an ImageView and a TextView.Have images in drawable folder to differentiate each tilting motion(Here I have images for center,top,right,bottom and left).

activity_accelerometer.xml


<RelativeLayout xmlns:android="http://schemas.android.com/apk/res/android"
xmlns:tools="http://schemas.android.com/tools"
android:id="@+id/relative"
android:layout_width="fill_parent"
android:layout_height="fill_parent" >
<TextView
android:id="@+id/txt"
android:layout_width="fill_parent"
android:layout_height="wrap_content"
android:textSize="20dp"
android:text="Tilt the phone to see the difference" />

<ImageView
android:id="@+id/imageView1"
android:layout_width="fill_parent"
android:layout_height="fill_parent"
android:layout_below="@+id/txt"
android:layout_centerHorizontal="true"
android:scaleType="fitXY"
android:src="@drawable/center" />
</RelativeLayout>

3.Now in the AccelerometerActivity use a logic to identify the tilting action and replace the images accordingly. Do not forget to unregister the sensor to save battery.

AccelerometerActivity.java 

import android.app.Activity;
import android.content.Context;
import android.hardware.Sensor;
import android.hardware.SensorEvent;
import android.hardware.SensorEventListener;
import android.hardware.SensorManager;
import android.os.Bundle;
import android.widget.ImageView;
import android.widget.TextView;

public class AccelerometerActivity extends Activity implements
  SensorEventListener {

 private SensorManager mSensorManager;
 private Sensor mAccelerometer;
 TextView title;
 ImageView iv;

 @Override
 public void onCreate(Bundle savedInstanceState) {
  super.onCreate(savedInstanceState);
  setContentView(R.layout.activity_accelerometer);
  mSensorManager = (SensorManager) getSystemService(Context.SENSOR_SERVICE);
  mAccelerometer = mSensorManager
    .getDefaultSensor(Sensor.TYPE_ACCELEROMETER);
  title = (TextView) findViewById(R.id.txt);
  iv = (ImageView) findViewById(R.id.imageView1);
 }

 @Override
 public void onAccuracyChanged(Sensor arg0, int arg1) {
  // TODO Auto-generated method stub
 }

 @Override
 public void onSensorChanged(SensorEvent event) {
  float x = event.values[0];
  float y = event.values[1];
  float z = event.values[2];
  if (Math.abs(x) > Math.abs(y)) {
   if (x < 0) {
    iv.setImageResource(R.drawable.right);
   }
   if (x > 0) {
    iv.setImageResource(R.drawable.left);
   }
  } else {
   if (y < 0) {
    iv.setImageResource(R.drawable.top);
   }
   if (y > 0) {
    iv.setImageResource(R.drawable.bottom);
   }
  }
  if (x > (-2) && x < (2) && y > (-2) && y < (2)) {
   iv.setImageResource(R.drawable.center);
  }
 }

 @Override
 protected void onResume() {
  super.onResume();
  mSensorManager.registerListener(this, mAccelerometer,
    SensorManager.SENSOR_DELAY_NORMAL);
 }

 @Override
 protected void onPause() {
  super.onPause();
  mSensorManager.unregisterListener(this);
 }
}


4.Run the project by rightclicking project Run as → android project in an android device.

Output:

The output of this example would be similar to the one as follows:


Android Custom Gallery Example

Create your own gallery within android application.The following code will fetch the images from your SD card and display them in a grid view as thumbnails .On clicking on the thumbnail the image will be displayed in a new screen maximized.You can build on this code as per your requirement.

Now lets start by creating a simple project.


1.Create an android application project
2.Create a class file name 'MainActivity.java' (would be done when the poject is created)

MainActivity.java

public class MainActivity extends Activity {
 private int count;
 private Bitmap[] thumbnails;
 private String[] arrPath;
 private ImageAdapter imageAdapter;

 /** Called when the activity is first created. */
 @Override
 public void onCreate(Bundle savedInstanceState) {
  super.onCreate(savedInstanceState);
  setContentView(R.layout.activity_main);

  final String[] columns = { MediaStore.Images.Media.DATA,
    MediaStore.Images.Media._ID };
  final String orderBy = MediaStore.Images.Media._ID;
  Cursor imagecursor = managedQuery(
    MediaStore.Images.Media.EXTERNAL_CONTENT_URI, columns, null,
    null, orderBy);
  int image_column_index = imagecursor
    .getColumnIndex(MediaStore.Images.Media._ID);
  this.count = imagecursor.getCount();
  this.thumbnails = new Bitmap[this.count];
  this.arrPath = new String[this.count];
  for (int i = 0; i < this.count; i++) {
   imagecursor.moveToPosition(i);
   int id = imagecursor.getInt(image_column_index);
   int dataColumnIndex = imagecursor
     .getColumnIndex(MediaStore.Images.Media.DATA);
   thumbnails[i] = MediaStore.Images.Thumbnails.getThumbnail(
     getApplicationContext().getContentResolver(), id,
     MediaStore.Images.Thumbnails.MICRO_KIND, null);
   arrPath[i] = imagecursor.getString(dataColumnIndex);
  }
  GridView imagegrid = (GridView) findViewById(R.id.PhoneImageGrid);

  imageAdapter = new ImageAdapter();
  imagegrid.setAdapter(imageAdapter);
  imagecursor.close();
 }

 public class ImageAdapter extends BaseAdapter {
  private LayoutInflater mInflater;

  public ImageAdapter() {
   mInflater = (LayoutInflater) getSystemService(Context.LAYOUT_INFLATER_SERVICE);
  }

  public int getCount() {
   return count;
  }

  public Object getItem(int position) {
   return position;
  }

  public long getItemId(int position) {
   return position;
  }

  public View getView(int position, View convertView, ViewGroup parent) {
   ViewHolder holder;
   if (convertView == null) {
    holder = new ViewHolder();
    convertView = mInflater.inflate(R.layout.galleryitem, null);
    holder.imageview = (ImageView) convertView
      .findViewById(R.id.thumbImage);

    convertView.setTag(holder);
   } else {
    holder = (ViewHolder) convertView.getTag();
   }
   holder.imageview.setId(position);

   holder.imageview.setOnClickListener(new OnClickListener() {

    public void onClick(View v) {
     // TODO Auto-generated method stub
     int id = v.getId();
     Intent intent = new Intent(MainActivity.this,
       lastscreen.class);
     intent.setDataAndType(Uri.parse("file://" + arrPath[id]),
       "image/*");
     intent.putExtra("path", arrPath[id]);
     startActivity(intent);
    }
   });
   holder.imageview.setImageBitmap(thumbnails[position]);
   return convertView;
  }
 }

 class ViewHolder {
  ImageView imageview;
 }
}


3.Now design the UI for your gallery with the 'activity_main.xml',and 'galleryitem.xml' files.

activity_main.xml

<?xml version="1.0" encoding="utf-8"?>
<RelativeLayout xmlns:android="http://schemas.android.com/apk/res/android"
    android:layout_width="fill_parent"
    android:layout_height="fill_parent" >

    <GridView
        android:id="@+id/PhoneImageGrid"
        android:layout_width="fill_parent"
        android:layout_height="fill_parent"
        android:columnWidth="90dp"
        android:gravity="center"
        android:horizontalSpacing="10dp"
        android:numColumns="auto_fit"
        android:stretchMode="columnWidth"
        android:verticalSpacing="10dp" />

</RelativeLayout>


galleryitem.xml
<?xml version="1.0" encoding="utf-8"?>
<RelativeLayout xmlns:android="http://schemas.android.com/apk/res/android"
android:layout_width="fill_parent"
android:layout_height="fill_parent">
<ImageView
android:id="@+id/thumbImage"
android:layout_width="wrap_content"
android:layout_height="wrap_content"
android:layout_centerInParent="true" />
</RelativeLayout>
4.Now add a new activity to your application with 'lastscreen.java' and 'lastscreen.xml' to display the image maximized on clicking the thumbnail.

lastscreen.java


public class lastscreen extends Activity {
 @Override
 public void onCreate(Bundle savedInstanceState) {
  super.onCreate(savedInstanceState);
  setContentView(R.layout.lastscreen);
  Intent in = getIntent();
  String path = in.getStringExtra("path");
  ImageView i = (ImageView) findViewById(R.id.imageView1);
  Bitmap new_image = BitmapFactory.decodeFile(path);
  i.setImageBitmap(new_image);
 }

}
lastscreen.xml

<?xml version="1.0" encoding="utf-8"?>
<LinearLayout xmlns:android="http://schemas.android.com/apk/res/android"
android:layout_width="fill_parent"
android:layout_height="fill_parent"
android:orientation="vertical" >

<ImageView
android:id="@+id/imageView1"
android:layout_width="fill_parent"
android:layout_height="wrap_content"
android:layout_weight="0.72"
android:src="@drawable/ic_launcher"
android:scaleType="fitXY" />

</LinearLayout>

Now run the project to get a similar output(If running in emulato please check that there are images loaded in sd)
Please remove code that closes cursor in Android 4.0 and higher.


Android Multiple Language Support Example


This is one among the reason why android warns you about hardcoded labels in your application. If you want your application to support multiple languages or to be set to the device language the strings.xml file in the values folder is the one you should look for.

By default android sets your application language to English. If you want your application to support another language say French. All you have to do is to create a folder named ‘values-fr’ under ‘res’ folder and place the ‘strings.xml’ (like the path res/values-fr/strings.xml)
Create the stings.xml file in res/values/strings.xml as

<?xml version="1.0" encoding="utf-8"?>
<resources>
<string name="app_name">My Application</string>
<string name="hello">Hello World, This is a language test application</string>
<string name="textview">This is a textview</string>
<string name="editview">This is a editview</string>
<string name="button">This is a button</string>
</resources>

Create the stings.xml file in res/values-fr/strings.xml as

<?xml version="1.0" encoding="utf-8"?>
<resources>
<string name="app_name">Mon application</string>
<string name="hello">Bonjour tout le monde, Il s\'agit d\'une application de test de langue</string>
<string name="textview">Il s\'agit d\'une textview</string>
<string name="editview">Il s\'agit d\'une editview</string>
<string name="button">Il s\'agit d\'un bouton</string>
</resources>

Now run the application and your activity would look like


Now change the device language to french and the same activity would look like


Android - Adding Image, Text and Background to a Button

To have a button with image, text and background in android . Edit the button tag on the .xml file as follows

Sample:
<Button
    android:id="@+id/ButtonTest"
    android:layout_width="wrap_content"
    android:layout_height="wrap_content"
    android:background="@drawable/ic_btn_bg"
    android:drawableTop="@drawable/ic_btn_img"
    android:text="My Button"
    android:textColor="#FFFFFF" >

</Button>

Here the above sample code is to align the image on top of the text in a button. It is also possible to align the image to the right ,left and bottom of the text by using
android:drawableBottom/Rigth/Left="@drawable/ic_btn_img"